Crew Safety Induction

This induction is for all crew working for EPS installing our products and services across the UK & Ireland

Language Options

Working on Client Sites

Site Inductions

  • Before working on each site, you must complete a site-specific briefing.
  • If you have any questions, please speak to your crew boss.

Behaviour

  • Please be mindful of your behaviour when on site, you represent EPS and our reputation with our clients.
  • Be polite and avoid the use of foul language, especially when around others.

Our Safety

Yours, ours, and everyone else’s safety

  • Be aware of those around you, especially work colleagues, and what you are doing. If you need to pause for 30 seconds until someone gets out of the way, then that’s ok.
  • If something isn’t right, doesn’t look right, or you think something is unsafe, say something. If you need to say STOP, get the crew boss involved to make an assessment and ensure that it is safe to continue.

If you’re not sure

  • If you’re not sure how to do something or it seems unsafe, ask your crew boss. Do not attempt to do it without following the instructions; some of the equipment can cause harm if not properly installed, as outlined in the procedures further on in this induction.
  • Always ask if you’re unsure; there’s no such thing as a stupid question when it comes to safety.

Alcohol and Illegal Drugs

Whilst on-site there is a ZERO tolerance for being under the influence of alcohol or illegal drugs.

  • If you are suspected of being under the influence of either you will be removed from the site immediately and may face disciplinary action.

Working around Plant and Machinery

You may be required to work with forklift trucks and other pieces of machinery and equipment. 

  • You must wear suitable PPE when working around plant and machinery
    • Hi Visibility clothing
    • Toe protective footwear.
  • Stay in sight of the plant operator so they can see you at all times.
    • Avoid walking behind plant, especially when it is being reversed.
  • Ensure you stay alert and can hear what is going on around you.
    • Wearing headphones is strictly not allowed.
  • Do not operate any plant or machinery unless you have had suitable training and have been given permission by your EPS Crew Boss.

Section 2

Personal Protective Equipment (PPE)

PPE

Minimum PPE to be worn whilst on site

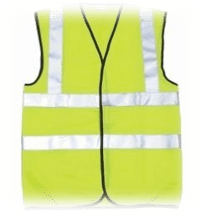
  • Hi -Viz vest;
  • Toe protective footwear, ideally boots that provide ankle support;
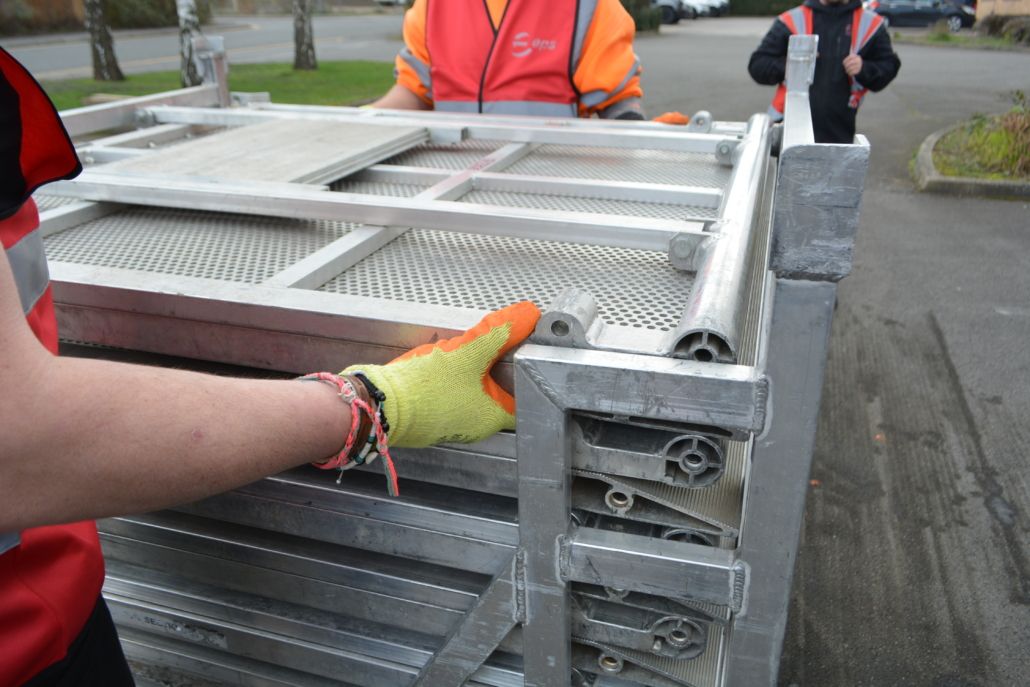
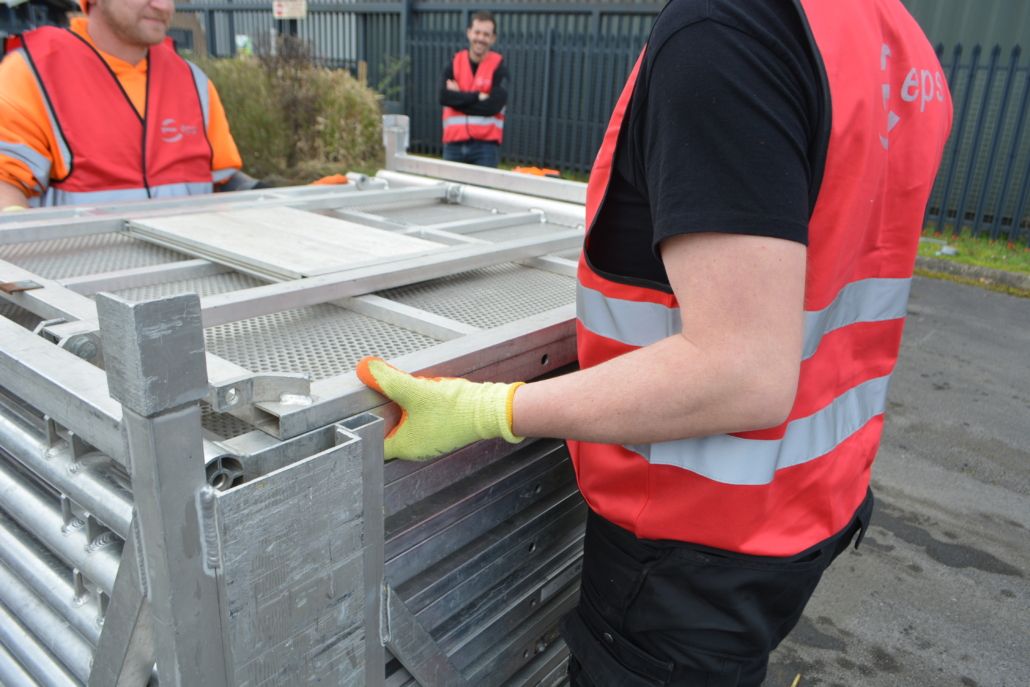
  • Work gloves when installing and dismantling products.

Hi Visibility Clothing

Toe Protection

Steel/ Composite Toe Protective Footwear

  • As a minimum, you should wear toe protective footwear when on site, this includes any standby periods whilst onsite during an event.

Work Gloves

Don’t forget your gloves.

  • Ensure you have suitable work gloves and wear them at all times. They help keep your hands clean and can prevent cuts and scrapes when handling the products.

Manual Handling

T-I-L-E

T stands for task. Think about the nature of the manual handling task itself:

  • Does it involve lifting, lowering, twisting, carrying, pushing, or pulling?
  • How may these actions affect your health and safety?
  • Does the task contain any strenuous movements, long distances, uneven weight distributions, or repetitive movements?

I stands for individual. Think about who will be carrying out the manual handling task:

  • How strong, fit, or capable is the individual?
  • Are they suitable for manual handling on their own?
  • Do they require support to complete the task?

L stands for load. Think about the object or person being moved:

  • Is the weight unusually heavy, bulky, difficult to hold, or unstable?

E stands for environment. Think about where the load is being moved from and to:
    • Is there a lack of space?
    • Is the flooring wet or irregular?
    • Is there enough lighting?
    • Are there any potential trip hazards?

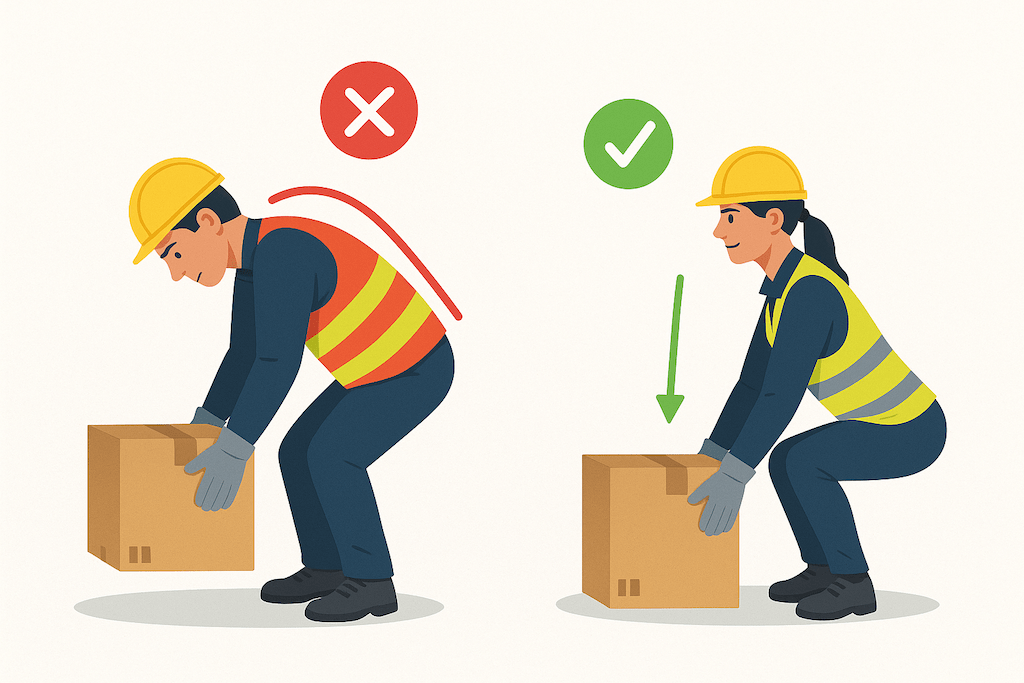
  • Keep your back straight

  • Bend at the knees

  • Lift within your limits

  • Don’t bend and lift with your back

  • Don’t lift things that are too heavy, ask for help

  • Don’t rush the lift

Section 4

GIGS Barrier

Top Weight Items = 100 + kg

❗️MINIMUM FOUR PERSON LIFT

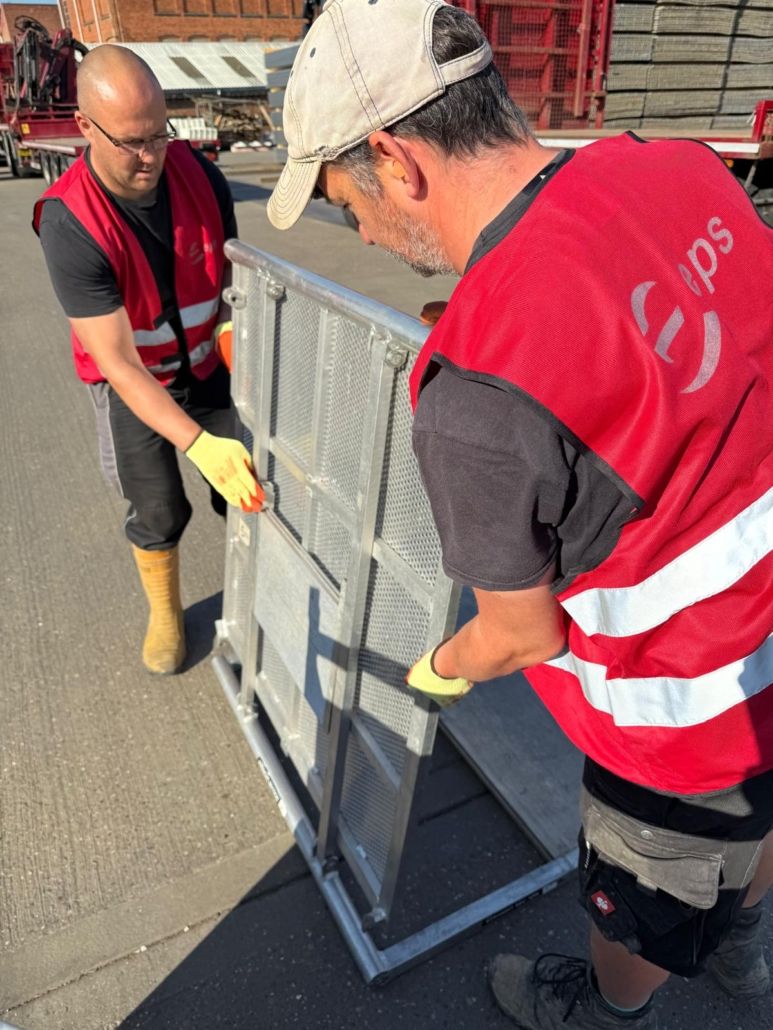
Weight per Barrier = 34 – 40 kg

❗️MINIMUM TWO PERSON LIFT

PPE required

  • A Hi-Viz vest or Jacket

  • Safety Boots (lace up with ankle support)

  • Gloves

Installation

Please watch the video below, which shows you the Gigs Barrier and how to handle it.

Installation

  • On-site, the stillages can be transported into position by forklift truck or pushed if the ground allows.
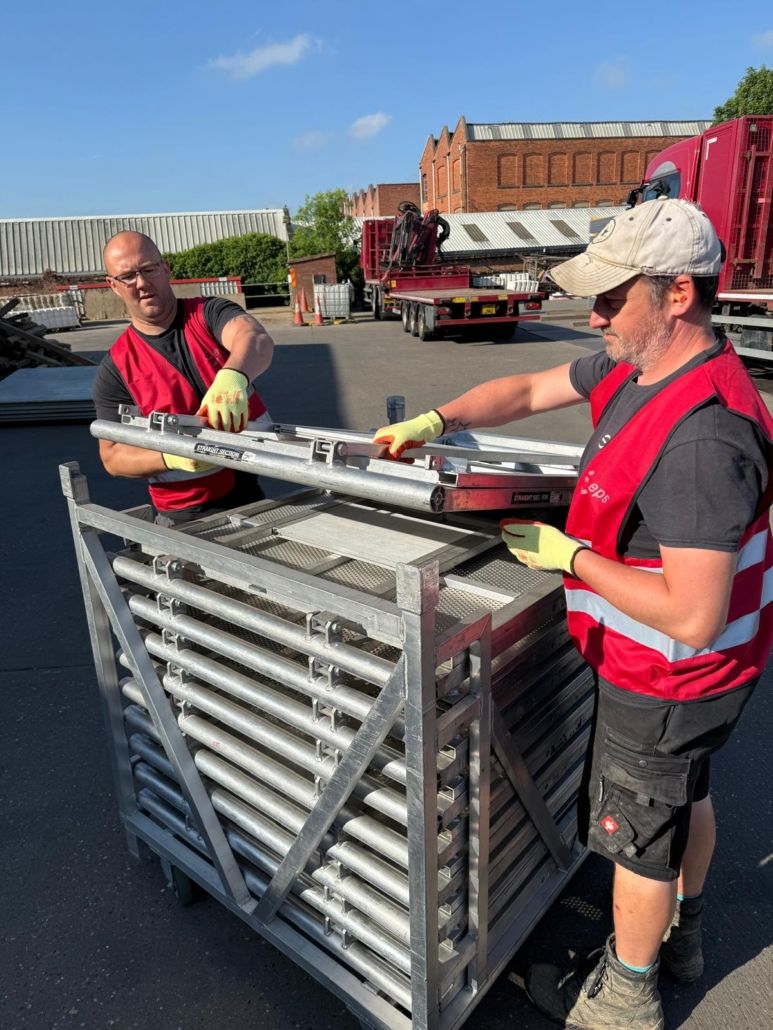
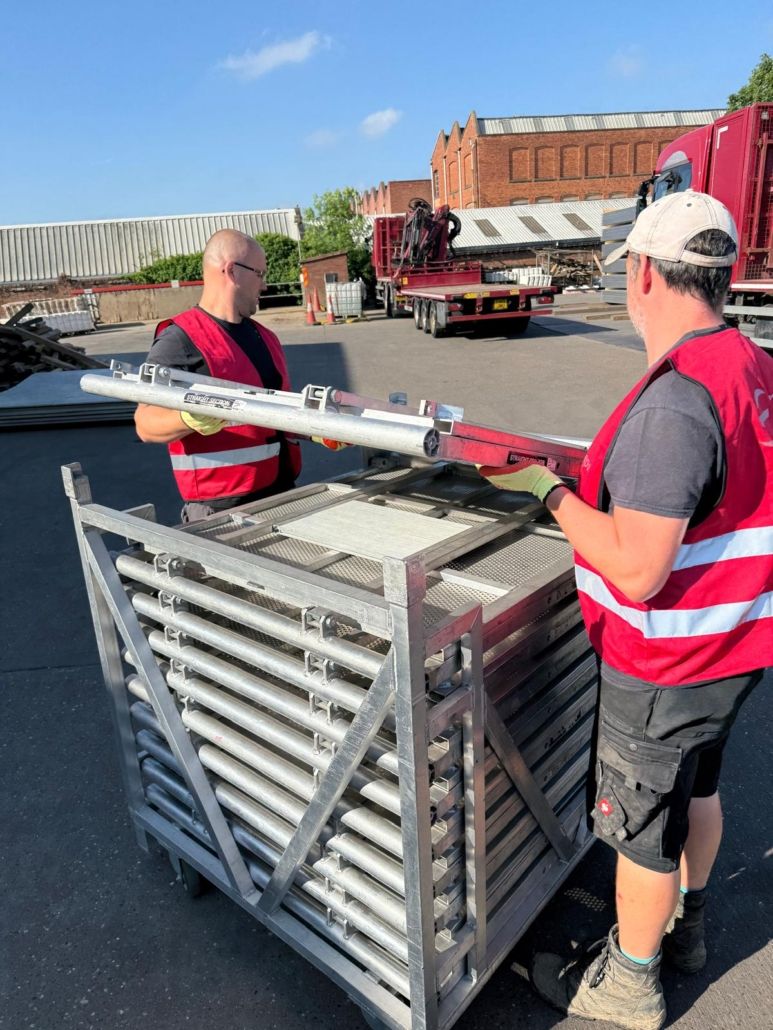
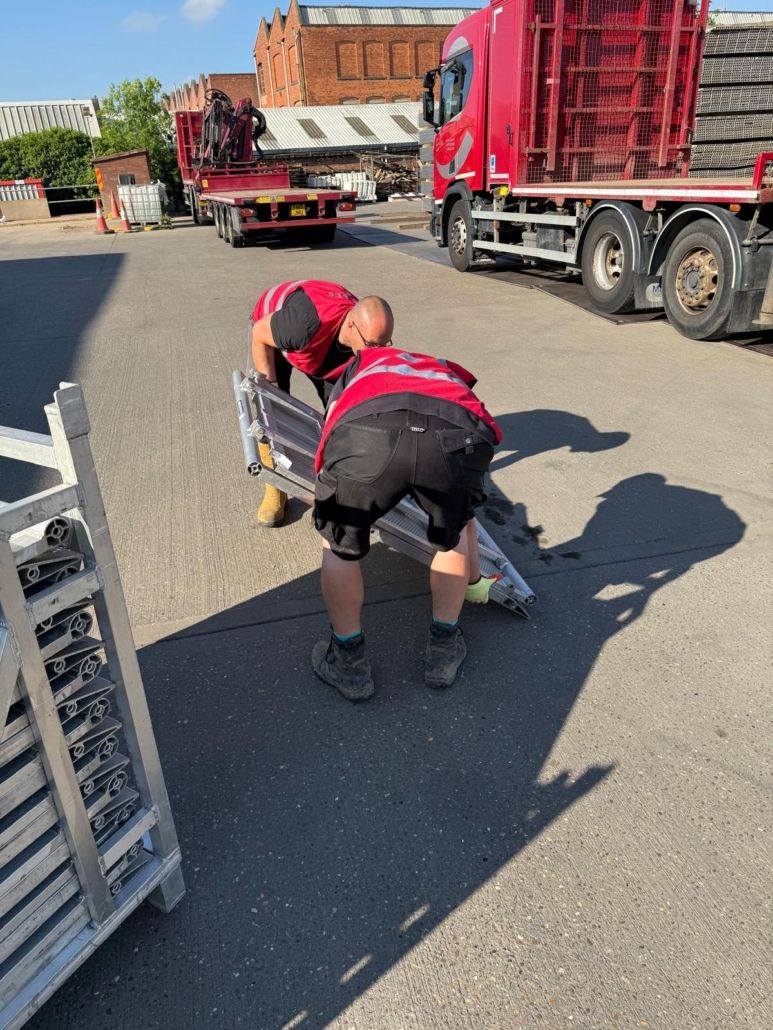
  • Two crew should lift out each section and lay it flat on the ground in the appropriate position, depending on the configuration required.
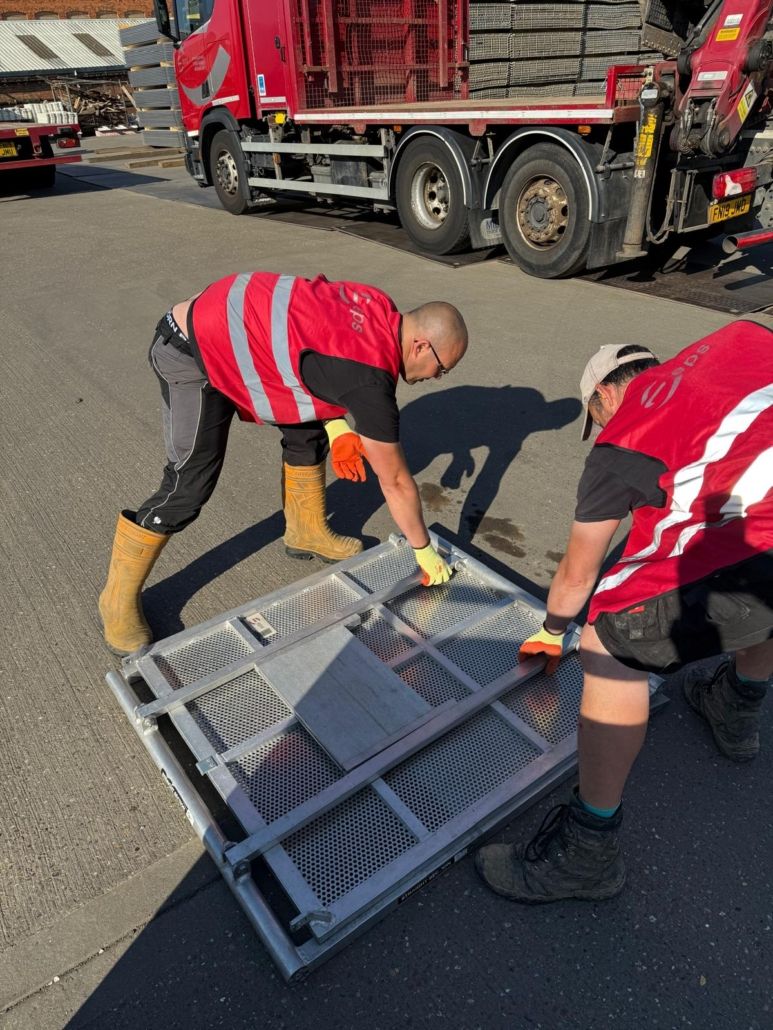
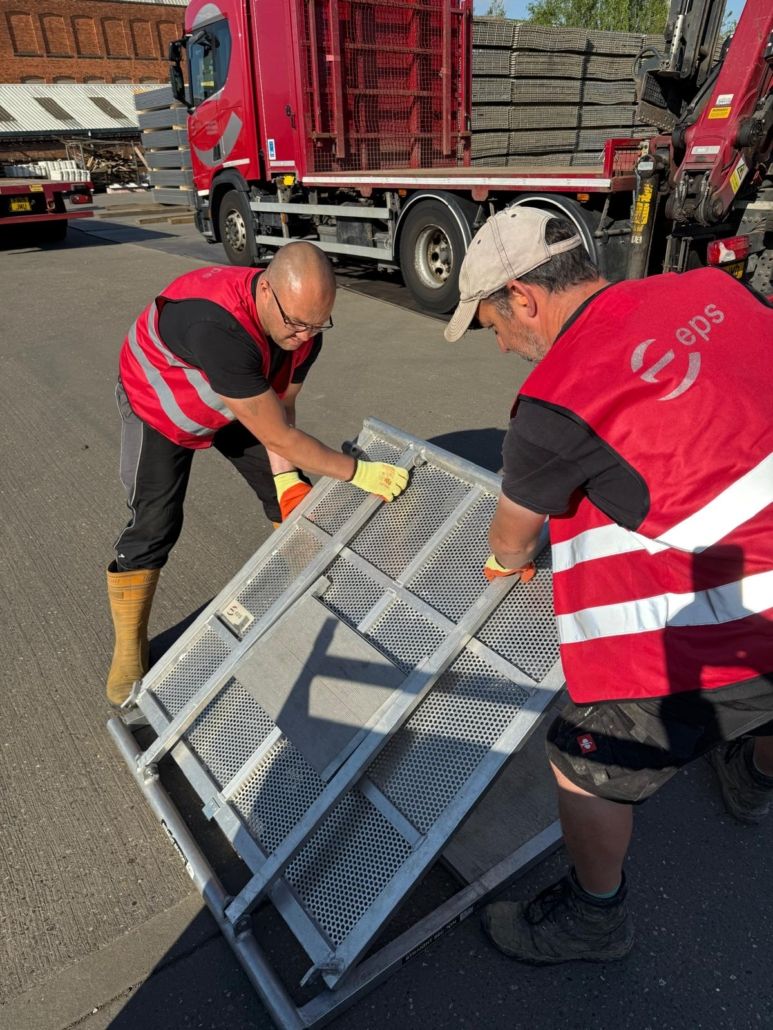
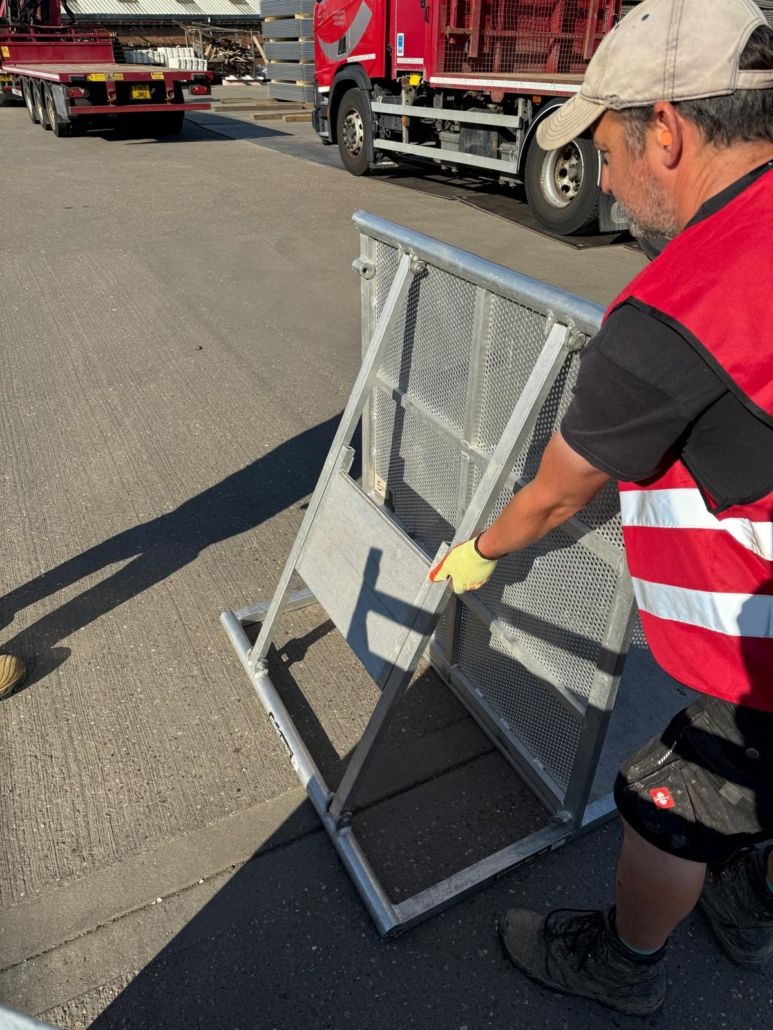
  • The top of the barrier is lifted to unfold the barrier.
  • Note – Care should be taken when positioning the hands to avoid trapping fingers.
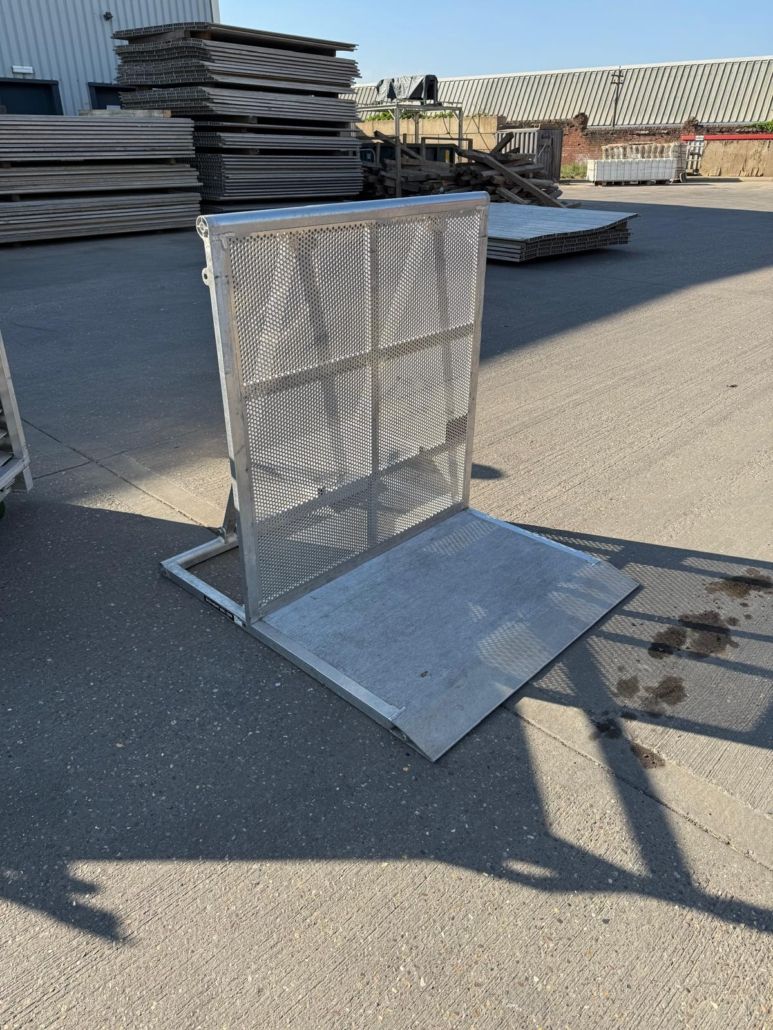
  • As the upright section of the barrier reaches vertical, the bottom edge is tapped forward to lock the step and barrier into the working position. These bottom lugs will be positioned under the front foot plate.
  • If rubber matting is to be used, it should be put in place before the barriers are assembled.
  • The barriers are slid together, ensuring the top and front locking pins connect, and a fixing bolt is inserted along the bottom edge. A battery-powered wrench or spanner is used to tighten the bolts.
  • Once complete, joints are taped with gaffer tape to ensure no pinch points along the barrier.
  • All accessories, i.e. angle sections and gates, are fitted using the same method as above.
  • Should the installation area be uneven then packing timbers are to be used under the footplate or rearmost chord to level the barriers. Anti-slip rubber matting should be used beneath the barrier on concrete or plastic flooring. Your EPS crew boss will tell you if this is required.

Recovery

Recovery

  • All bolts are removed using the battery-powered wrench or spanner, and the barriers are pulled apart.
  • Remove all tape from the barriers, and sweep/clean the debris from the barrier where possible.
  • The standing platform is lifted out of the locked position, and the bottom of the vertical section is slid towards the rear of the barrier so that it is folded flat. Note: Hold the barrier by the top of the brace until folded flat, placing fingers around the frame could lead to serious injury.
  • Move the empty barrier dollies as close to the barrier line as possible to avoid carrying the barrier long distances.
  • Use the correct lifting method, move the barrier dolly along the barrier line where possible, and avoid carrying the barrier long distances.
  • The two crew members lift the barrier and place it in the stillage for transportation. Barriers will only fit into the stillage one way and when held level, so do not force them into the stillage, as this may damage the barrier and injure the crew members. Check with the team lead if unsure of the correct procedure.

Section 5

Supa-Trac Flooring

Weight per pre formed Sheet = 47.1 kg

❗️MINIMUM TWO PERSON LIFT

PPE required

  • A Hi-Viz vest or Jacket

  • Safety Boots (lace up with ankle support)

  • Gloves

Installation

Please watch this video below which shows you the Supa-Trac and how to handle it.

Installation
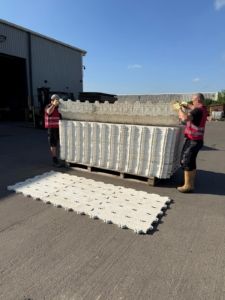
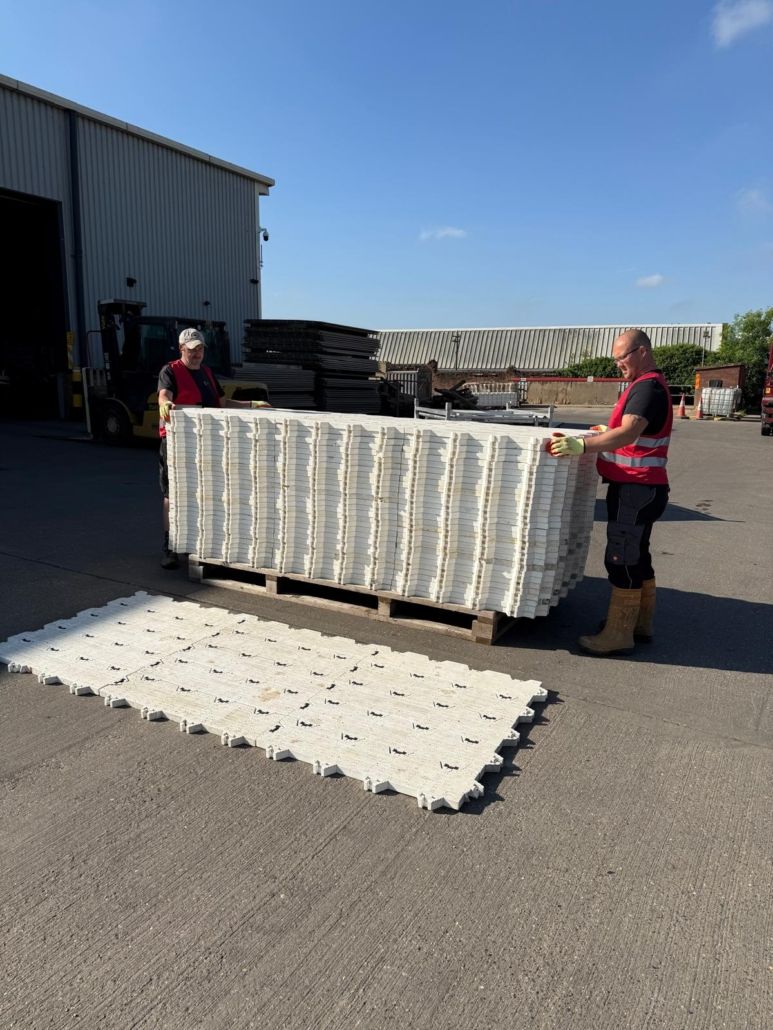
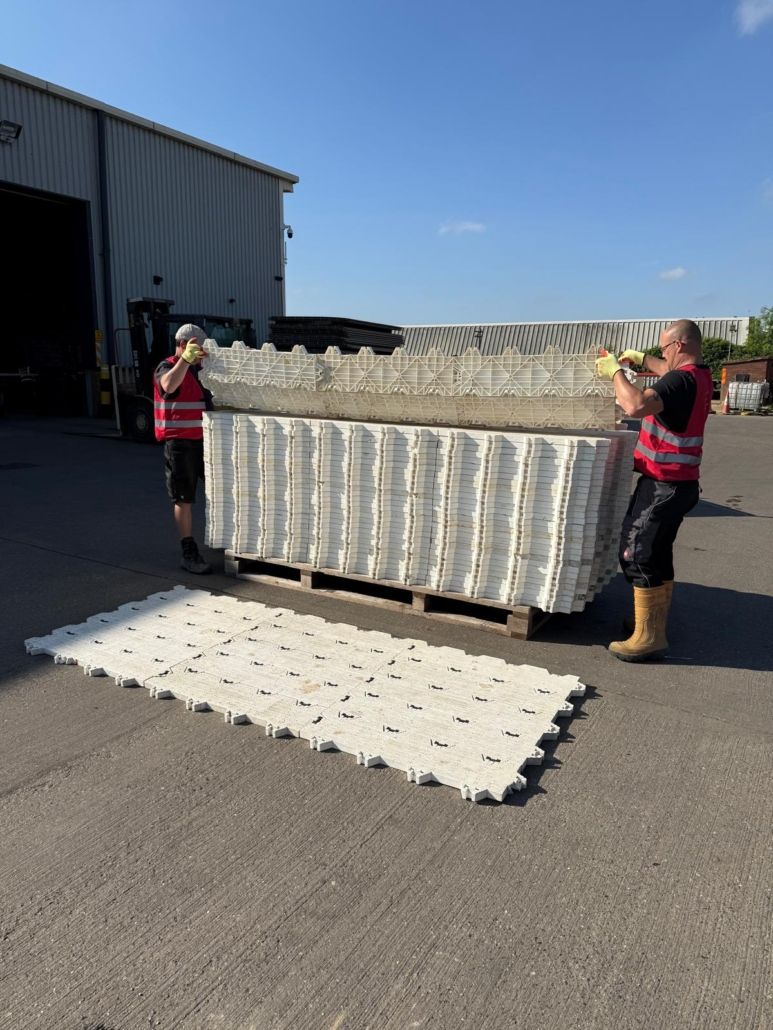
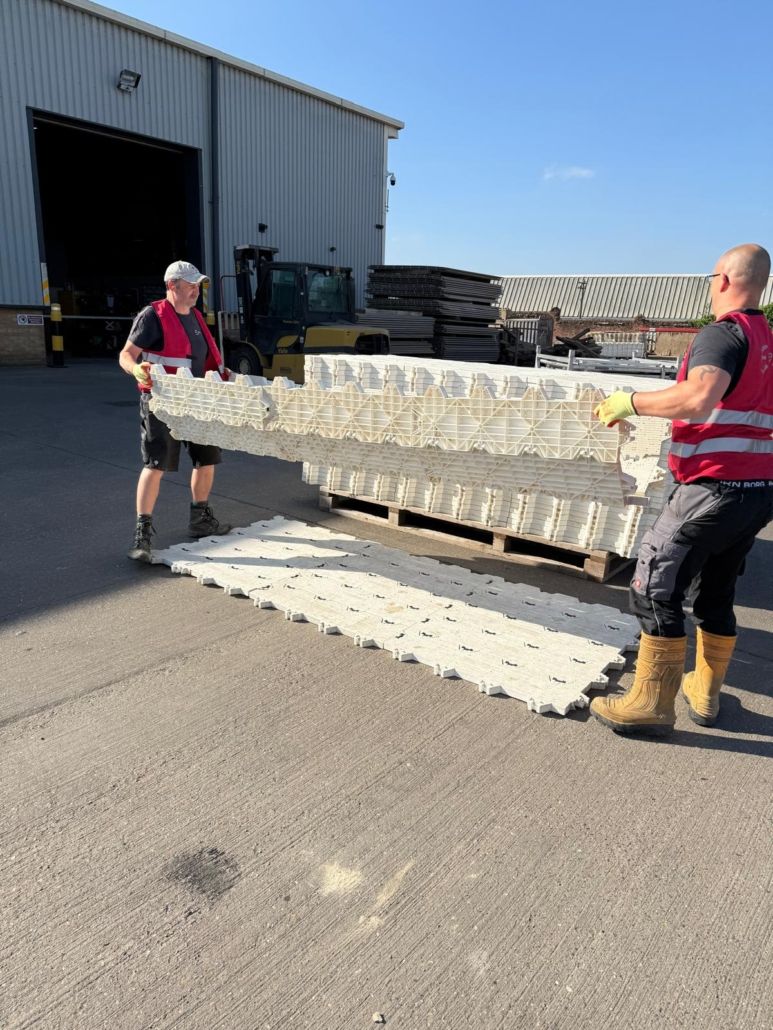
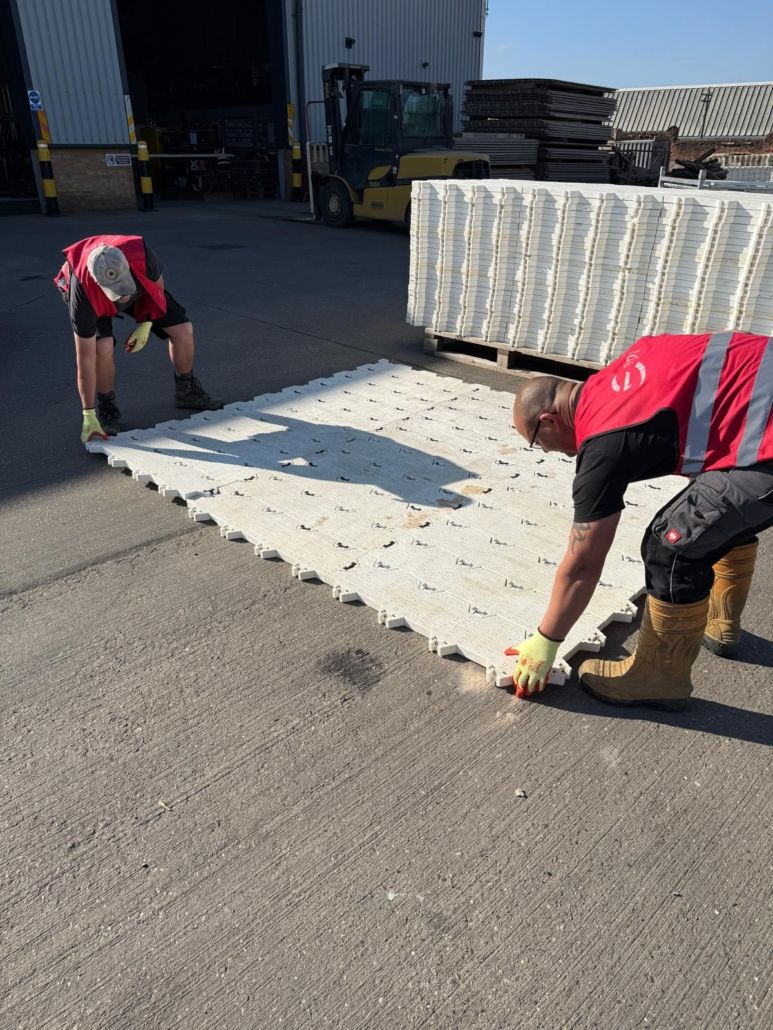
  • Each pallet / stillage is placed at a convenient location for the crew to install by hand. Supa-Trac is pre-connected in sheets of 15 sections, forming an area of 3.16m2 (5 by 3) and is installed by a minimum of two operatives.
  • The Supa-Trac can be installed in various configurations, as walkways, or as pads to cover large areas of ground. Each panel clips to the next panel using the built-in T-shaped connectors.
  • The installation is completed by starting on the left hand side working methodically to the right. This ensures the female connection points are readily available for the male connections to be fitted to.
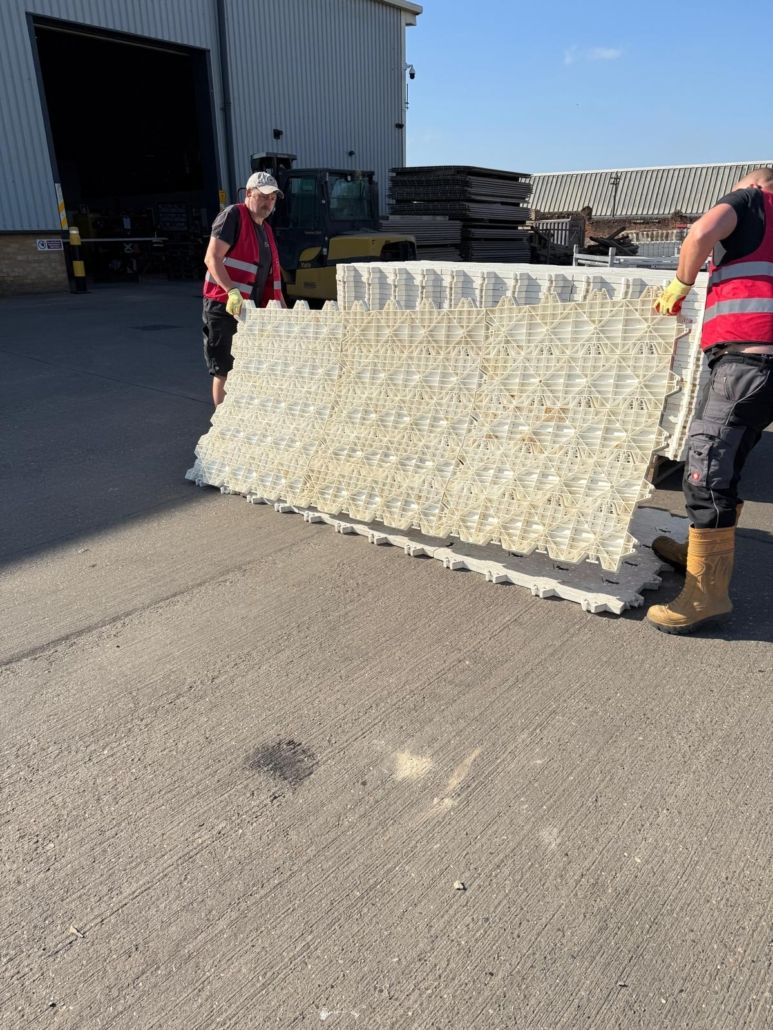
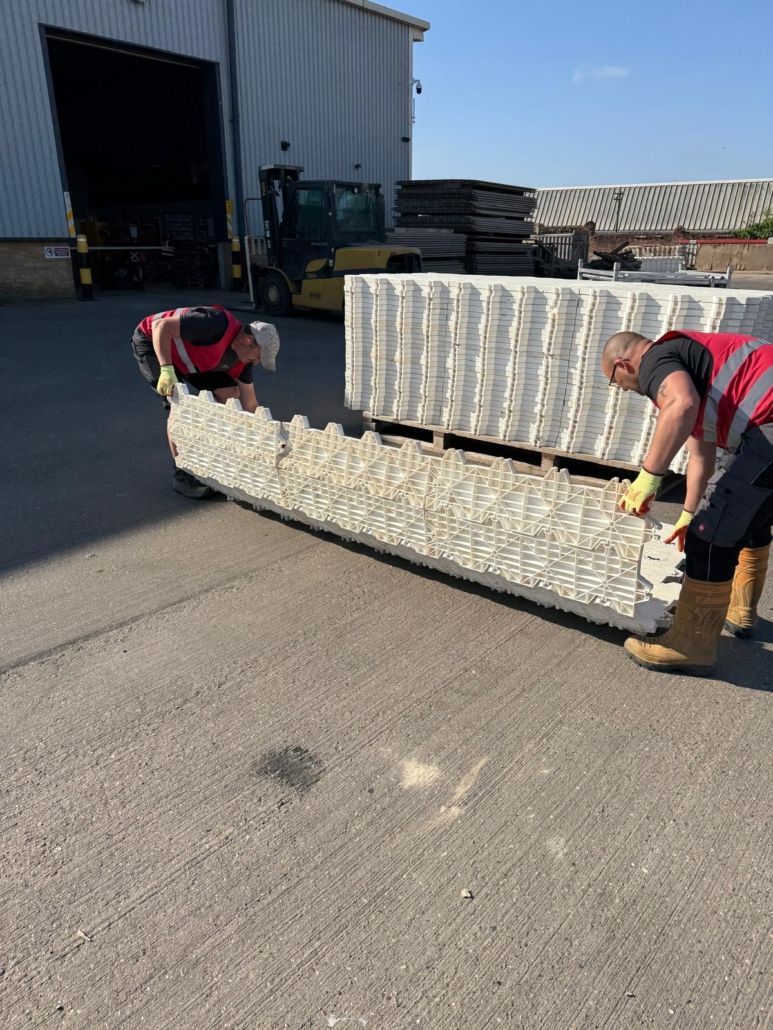
  • Each pre-formed sheet of 15 pieces is positioned by two operatives holding the sheets at each end. As the sheets are lifted from the stack, they are lifted so that the short end is folded into a U shape. This reduces the stresses on the joints.

  • The long edge is presented to the previously laid sheet so that the connectors are aligned. The sheet is then lowered to the floor and by applying a little pressure along the joint, the sheet is secured into place. Where indicated by the crew boss, retaining
    clips should be used to secure the sheets to each other.
  • The Supa-Trac sheets should be positioned squarely against the next as described above, if you start to feel resistance in the installation then you will encounter problems.
  • Ramps where required are positioned at the outer perimeter of the installation and secured into position using the same method as above. Retaining clips should be used to secure ramps into position.
  • All clips should be a different colour in order to identify the joints.

Recovery

Recovery

  • Recovery is a reverse process of the installation.
  • Clips are removed and each pre-connected Supa-Trac sheet is lifted and uncoupled from its neighbour(s).
  • Supa-Trac is placed on pallets / stillages neatly with all connectors aligned as they are recovered.
  • For full pallets / stillages the recovery crew use a bander and banding or strap to secure the stack. Each pallet is double banded or double strapped as a minimum.
  • Any sandbags or packing that has been used for ground levelling is collected and placed in stillages for transport. Protective underlay is rolled up, recovered and loaded onto the recovery vehicle.
  • Any damaged sheets are segregated from the main stockpile for inspection by the client (if appropriate).

Section 6

ArmorDeck & TerraTrak®Plus Flooring

ArmorDeck Panel = 18.2 kg

TerraTrak®Plus Panel = 23 kg

PPE required

  • A Hi-Viz vest or Jacket

  • Safety Boots (lace up with ankle support)

  • Gloves

Installation

Please watch the video below, which shows you the ArmorDeck and how to handle it.

Installation

Both of these products are a two-person lift.

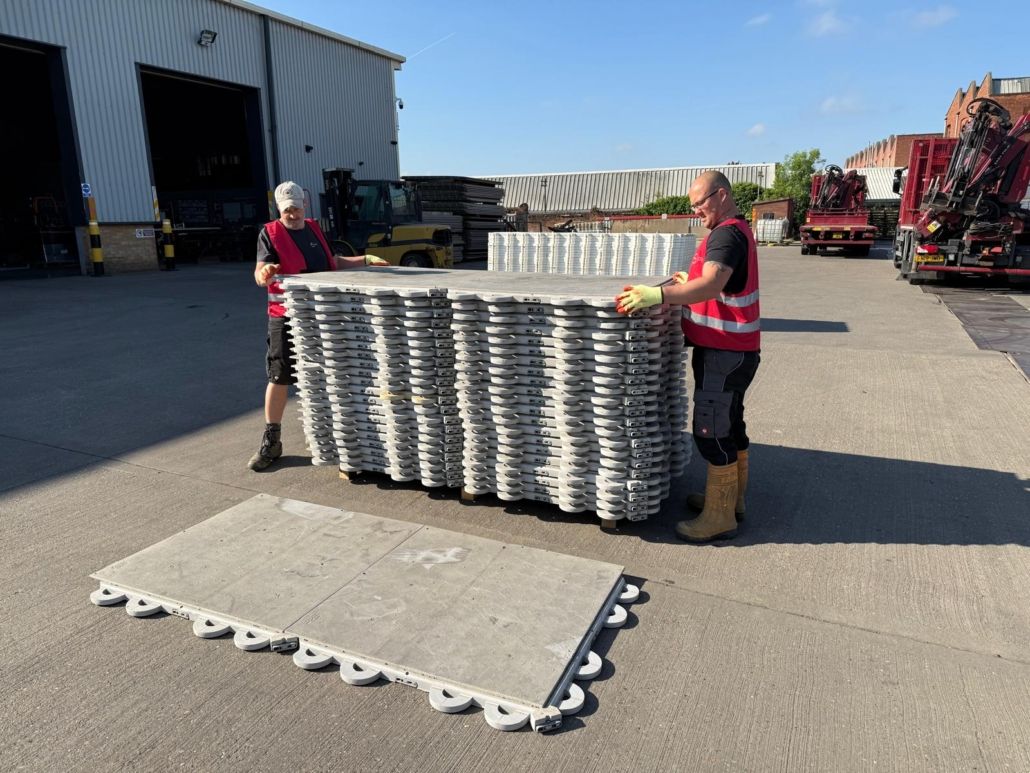
    • Pallets should be placed at a convenient location for the crew to install by hand. Both products are normally installed as unit of two tiles, although AmorDeck can be split and laid as single tiles if required.
    • The ArmorDeck/TerraTrak®Plus can be installed in various configurations, as walkways, or as pads to cover large areas of ground. Each panel is designed to clip into its neighbour(s) by using the built-in cam lock or T-shaped connectors. Where the ground is particularly uneven, packing timbers/sandbags are to be used.
    • The installation is started by starting on the left-hand side working methodically to the right.  This ensures the female side of the tile is offered up for the male side

      AmorDeck

      • Each tile is positioned by two operatives holding the tile at each end. As the tiles are lifted from the pallet, they are lifted so that the male/female ends drop straight into position
      • An operative with an ArmorDeck Key will lock in position the tiles as they are positioned.
      • The ArmorDeck tiles should be positioned squarely against the next as described above, if you start to feel resistance in the installation then you will encounter problems as you progress with the install, stop the install and rectify the problem.
      • Ramps where required are positioned at the outer perimeter of the installation and secured into position using the same method as above.

      TerraTrak+

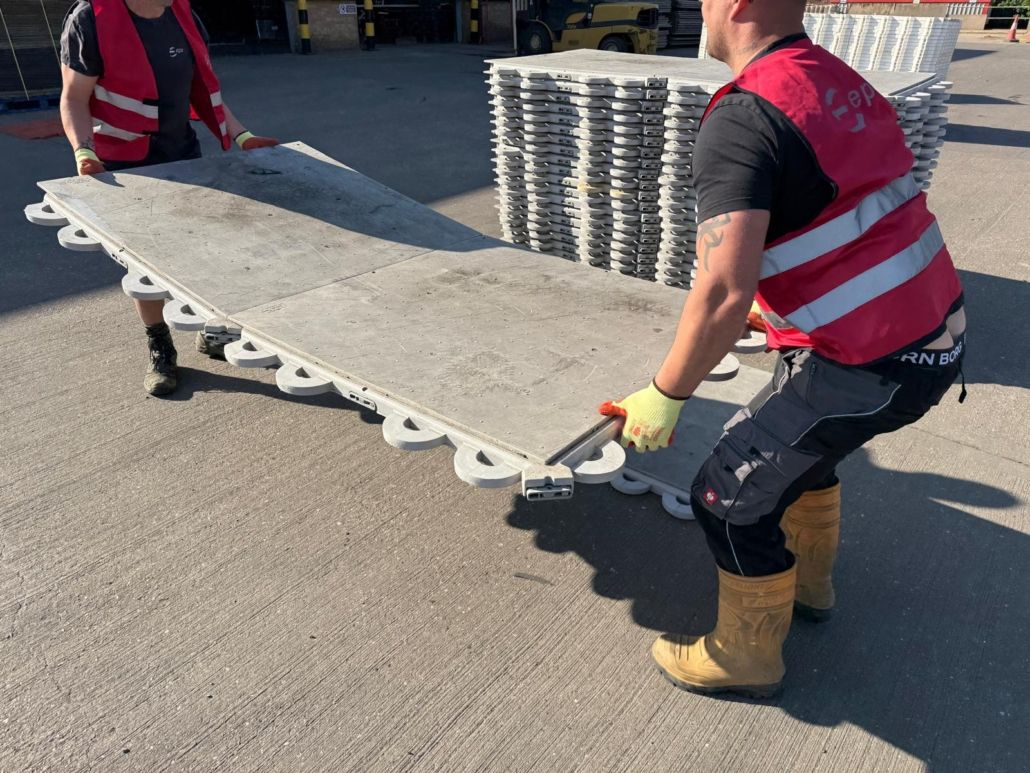
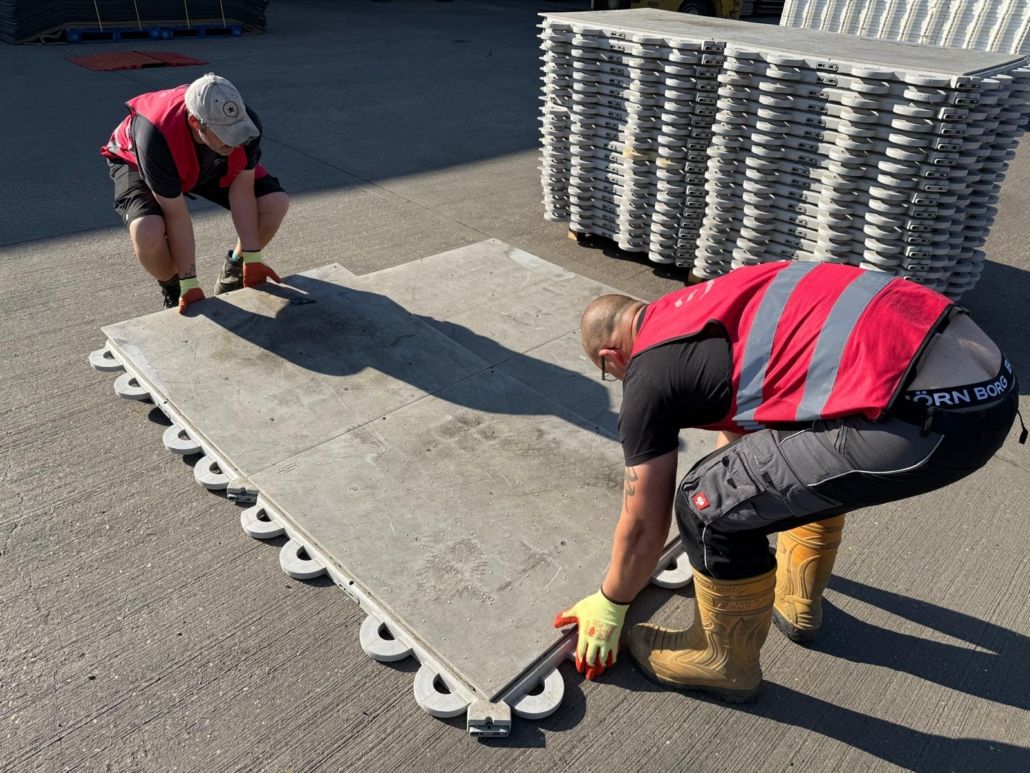
      • Each pre-formed sheet of 2 pieces is positioned by two operatives holding the sheets at each end. As the sheets are lifted from the stack, they are lifted so that the short end is folded into a U shape.  This reduces the stresses on the joints.
      • The long edge is presented to the previously laid sheet so that the connectors are aligned.  The sheet is then lowered to the floor and by applying a little pressure along the joint, the sheet is secured into place.
      • The TerraTrak®Plus sheets should be positioned squarely against the next as described above, if you start to feel resistance in the installation then you will encounter problems.
      • Ramps where required are positioned at the outer perimeter of the installation and secured into position using the same method as above. Retaining clips should be used to secure ramps into position.

Recovery

Recovery

  • Recovery is a reverse of the installation method. A crew member should unlock the rotary cams or the connectors, depending on the product being used.
  • The tiles should be placed on pallets, the EPS supervisor will confirm the number of tiles to go on each pallet.
  • If required, the stack of tiles should be banded or strapped onto the pallet
  • If a  geotextile membrane been used this  will need to be recovered once the panels are lifted, where possible this should be returned to eps uk for recycling

Section 7

RELLY + Vacuum Attachment

The Relly Machine is only to be operated by trained EPS Staff. This method statement is for crew operating forks and installing panels using hand tools, and bolts.

PPE required

  • A Hi-Viz vest or Jacket

  • Safety Boots (lace up with ankle support)

  • Gloves

Installation

Installation

  • The Relly can only be operated by EPS personnel; the Relly operator will brief the crew about how the panels are going to be laid and any signals or directions to be used.
  • The Relly operator will lift a single panel from the working pile/ FLT and manoeuvre the machine into position, then place the trackway panel on the ground in the correct position for the start of the installation.
  • The installation team will work alongside the Relly and its operator, maintaining a safe distance until the machine is stationary. Once the Relly is stationary, the Trackway panel is lowered into position, where the installation team will guide and locate the panel using the podger / panel locating pin provided for the panel installation. Once the panel is in position, the Relly operator will release the panel and return to the stack for the next one.
  • The installation team will use the podger locating pin to guide the panel against the adjacent panel. No force should be needed as the machine does the manoeuvring. Ensure the panel has a nut and fish plate in position and is ready for the next panel.
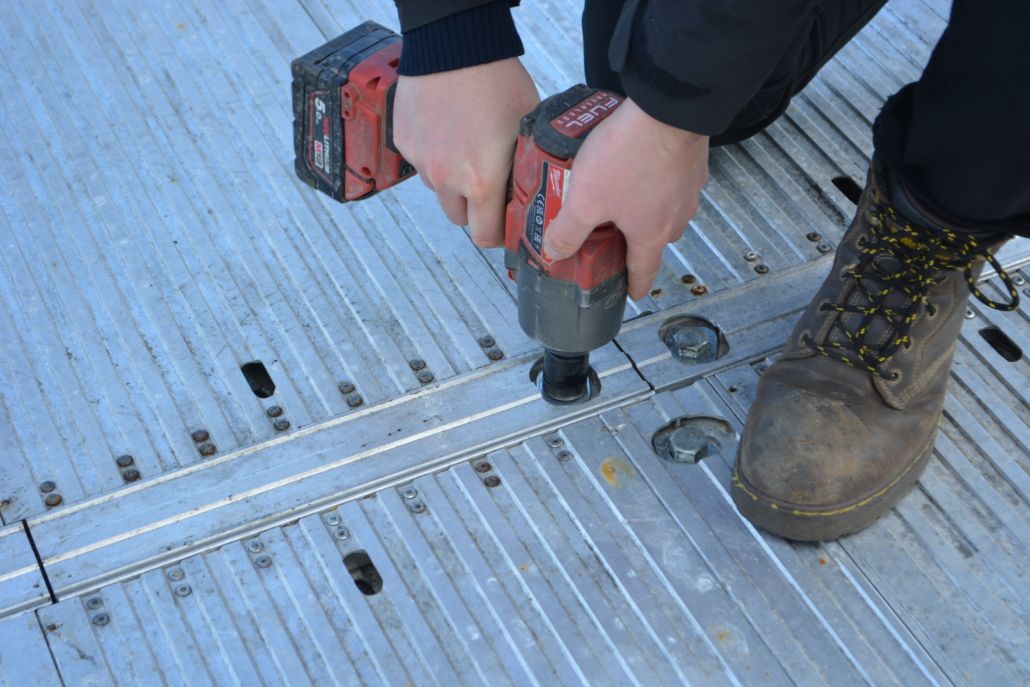
  • The installation team will use an impact drill to tighten the bolts and nuts. Due to the close proximity of the machines and personnel, all operations and manoeuvres will be as directed by the Relly operator.
  • Successive panels are lifted using the same technique; each one is positioned up to the previously laid panel using the Relly to manoeuvre it into place. Each panel is secured to the previous panel using nuts, bolts and washers with an impact wrench.
  • This process is repeated until the installation is complete.

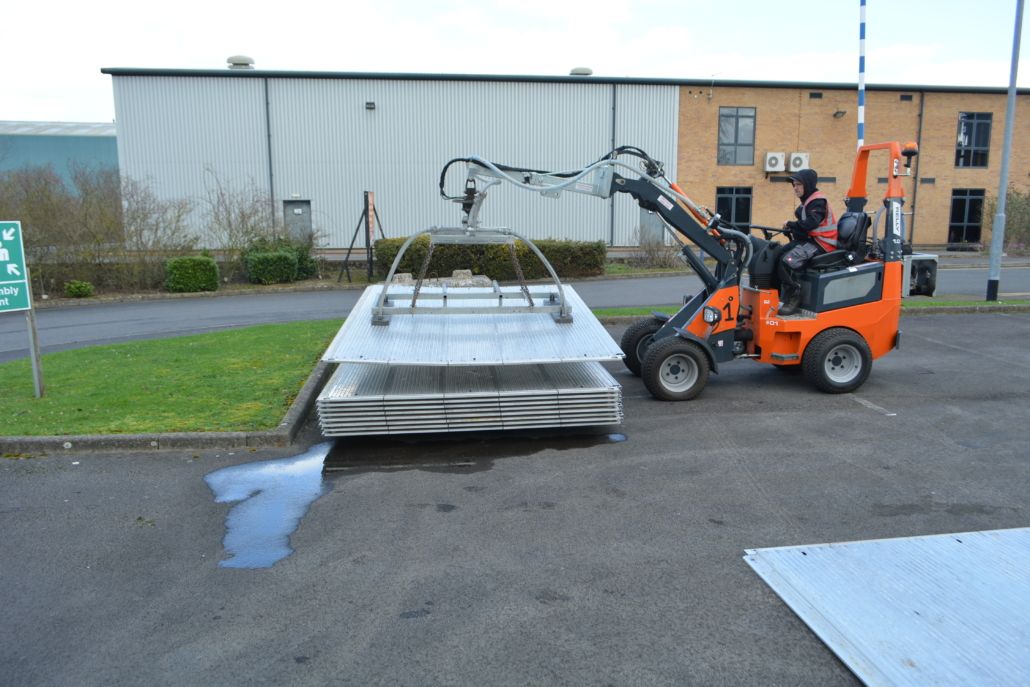
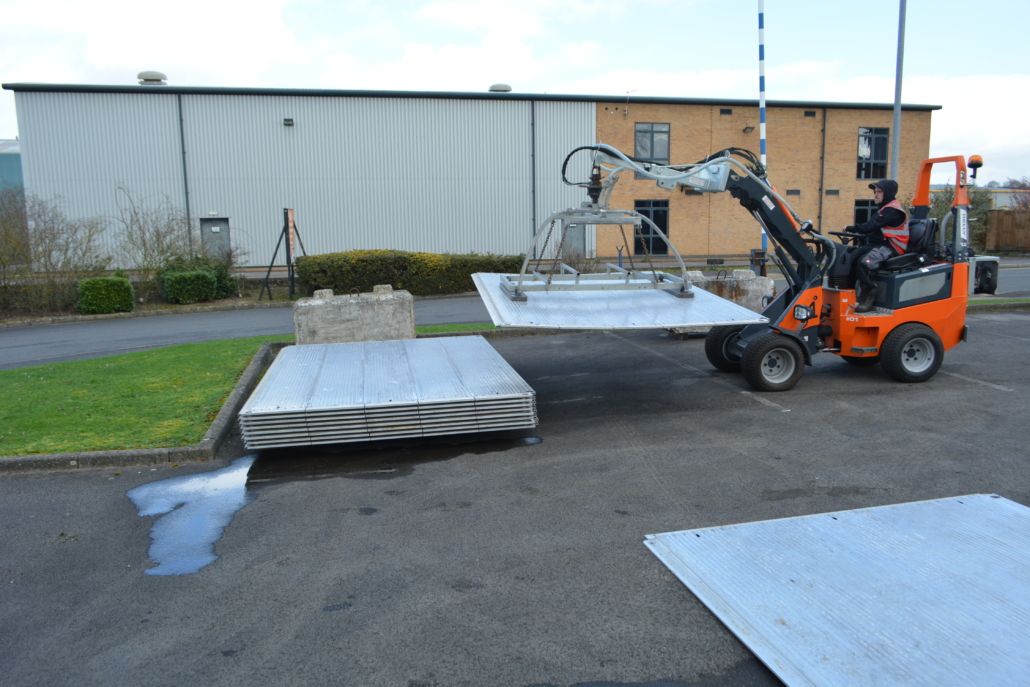
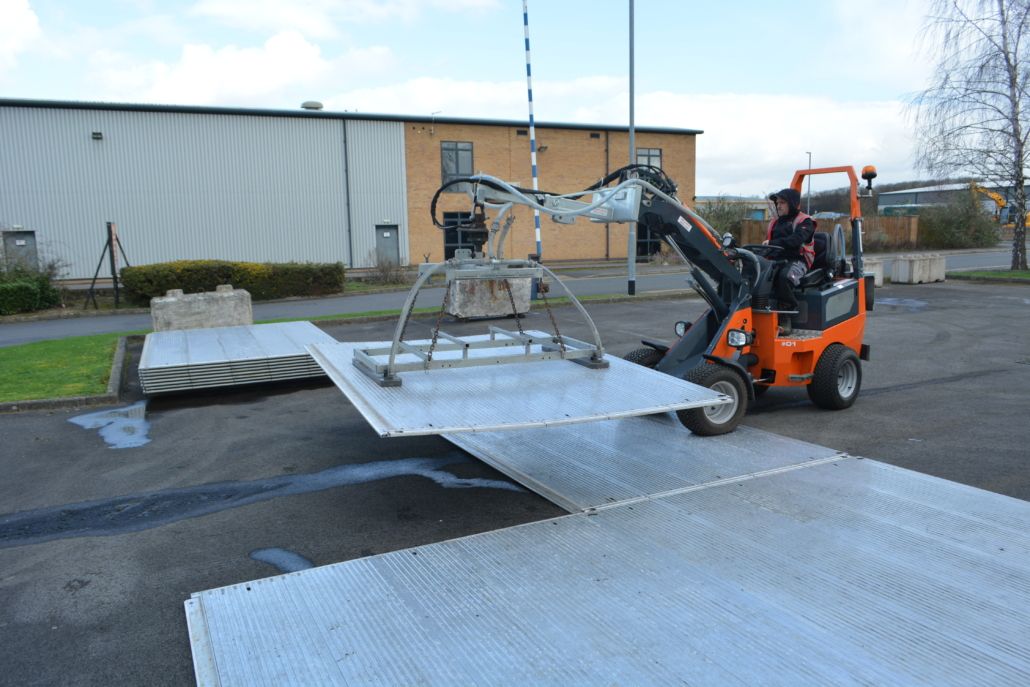
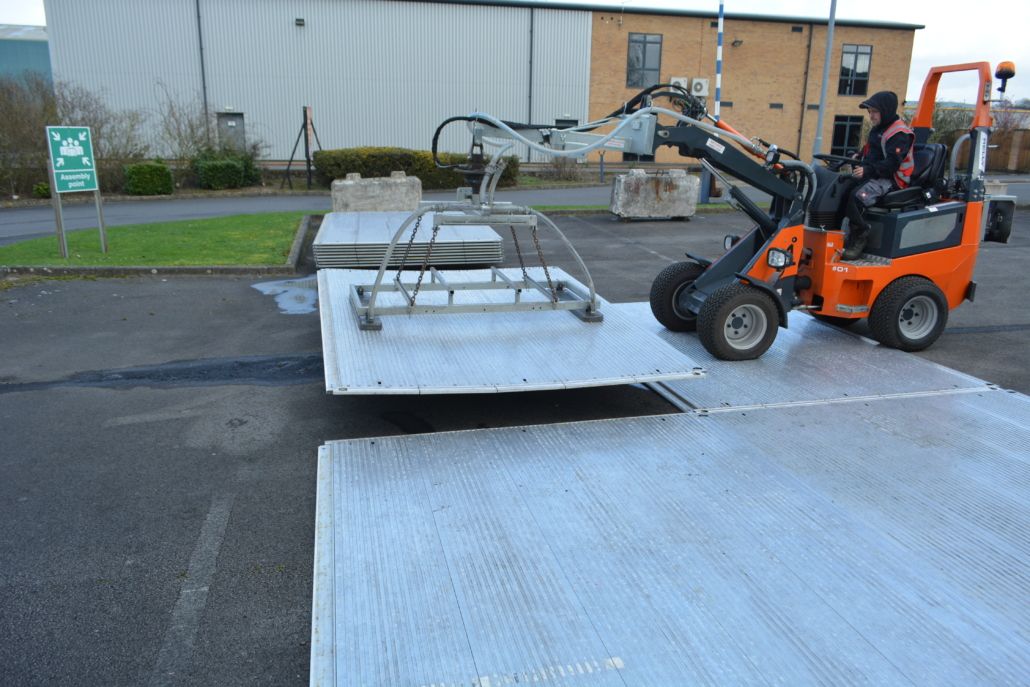
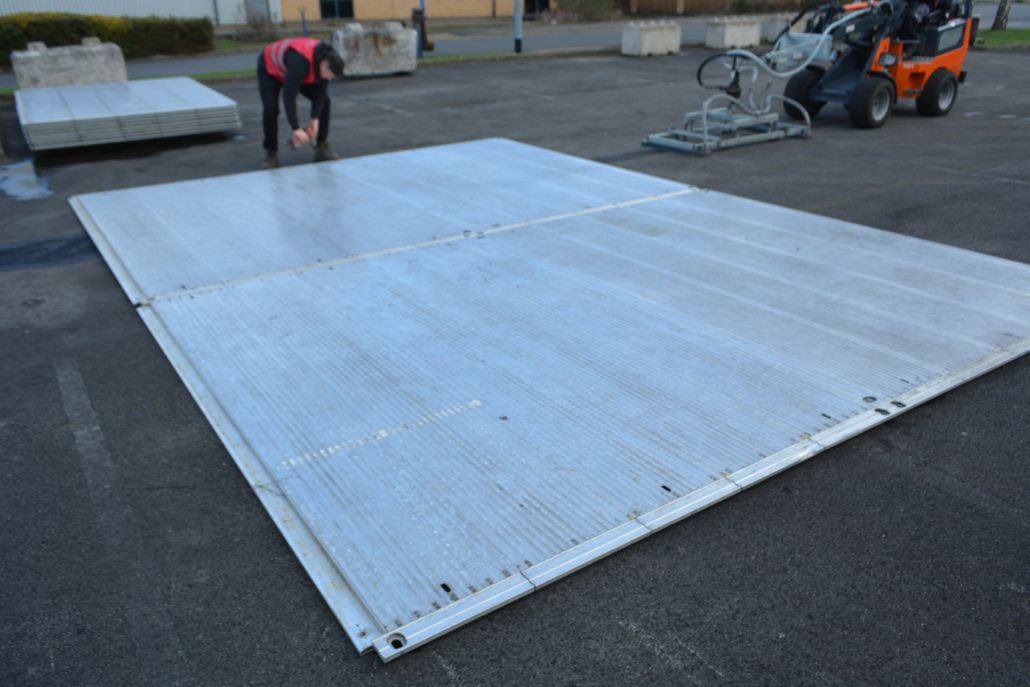
RELLY and Vacuum Attachment

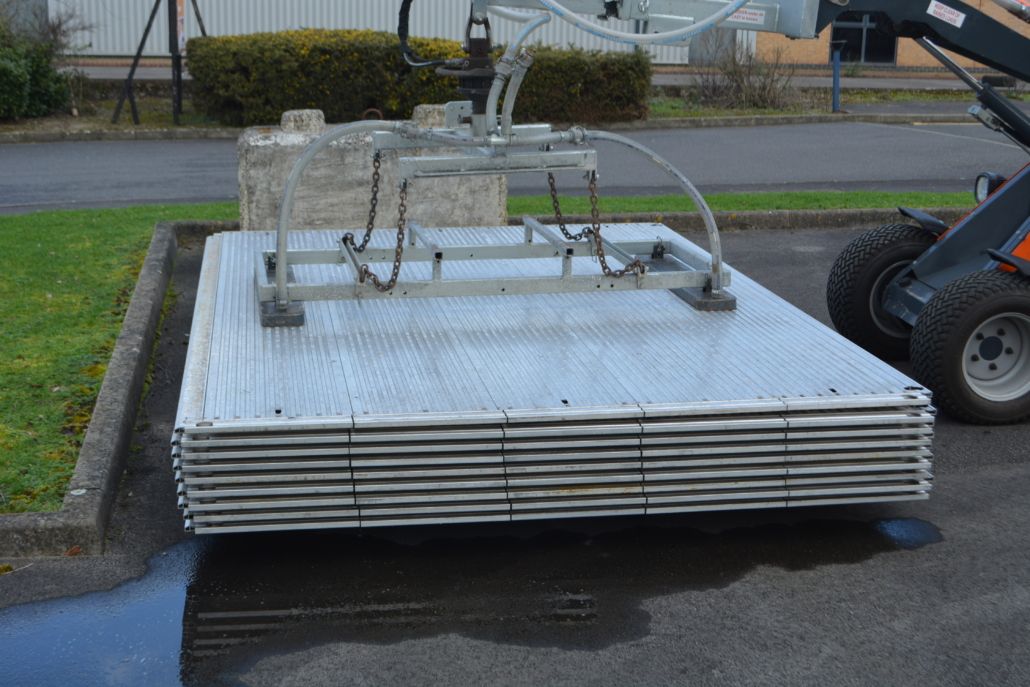
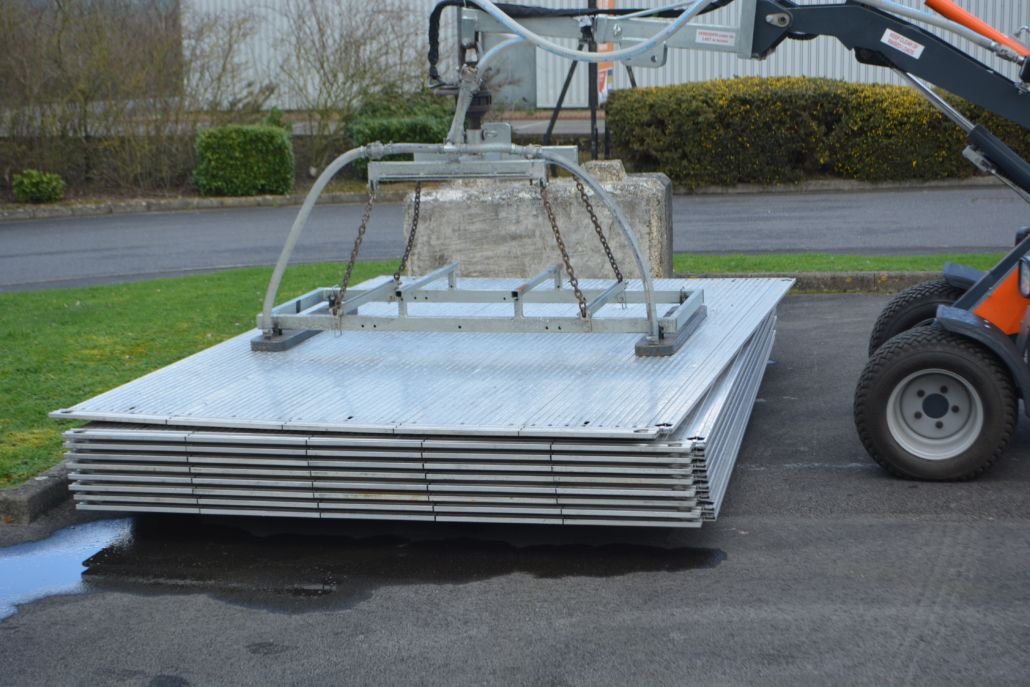
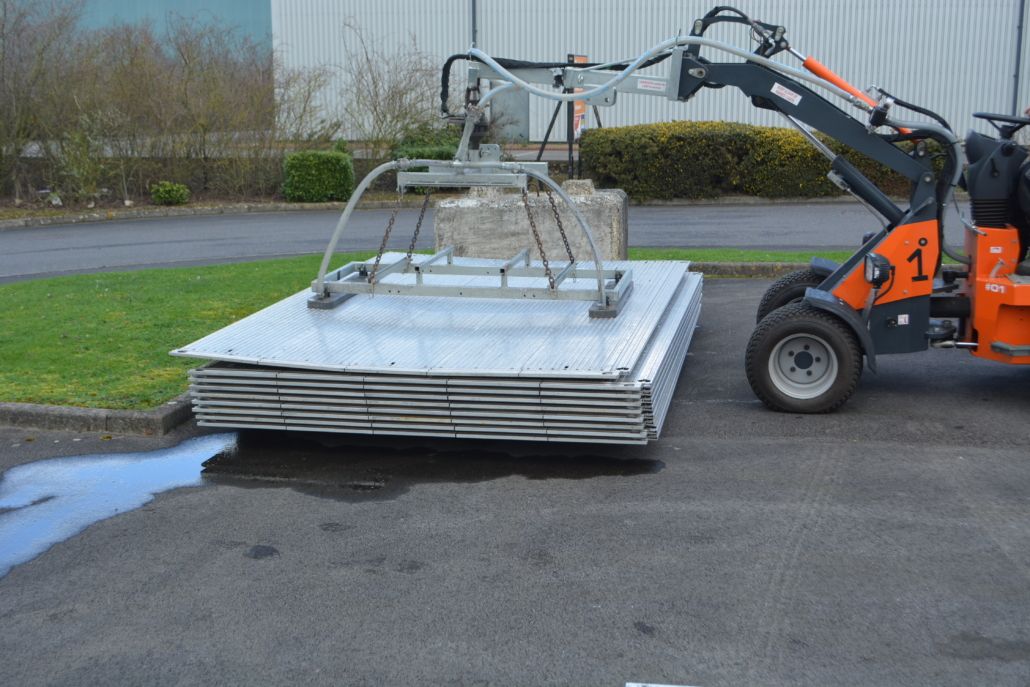
  • This can be seen in the images below on the right-hand side. The vacuum attachment attaches to a trackway panel through suction and transports it to where it is needed, then is installed by the crew.

Recovery

Recovery

  • The recovery of the Trackway is a reverse of the installation, applying all the same principles but in reverse.
  • The individual panels are unbolted by the two-person removal team.
  • Recovery is the reverse of the installation method. The removal team should confirm to the Relly operator that the bolts are removed and that they are clear of the panel before it is lifted.
  • If a geotextile membrane is used, it will need to be recovered once the trackway is lifted and, where possible, returned to EPS UK for recycling.
  • Should sandbags or packing have been used for ground levelling, then this is to be collected and placed in stillages for transport. Ensure the site is left as found. All litter and debris to be removed

Section 8

Arena Panels

Weight per Arena Panel = 190 kg

PPE required

  • A Hi-Viz vest or Jacket

  • Safety Boots (lace up with ankle support)

  • Gloves

Installation

Installation

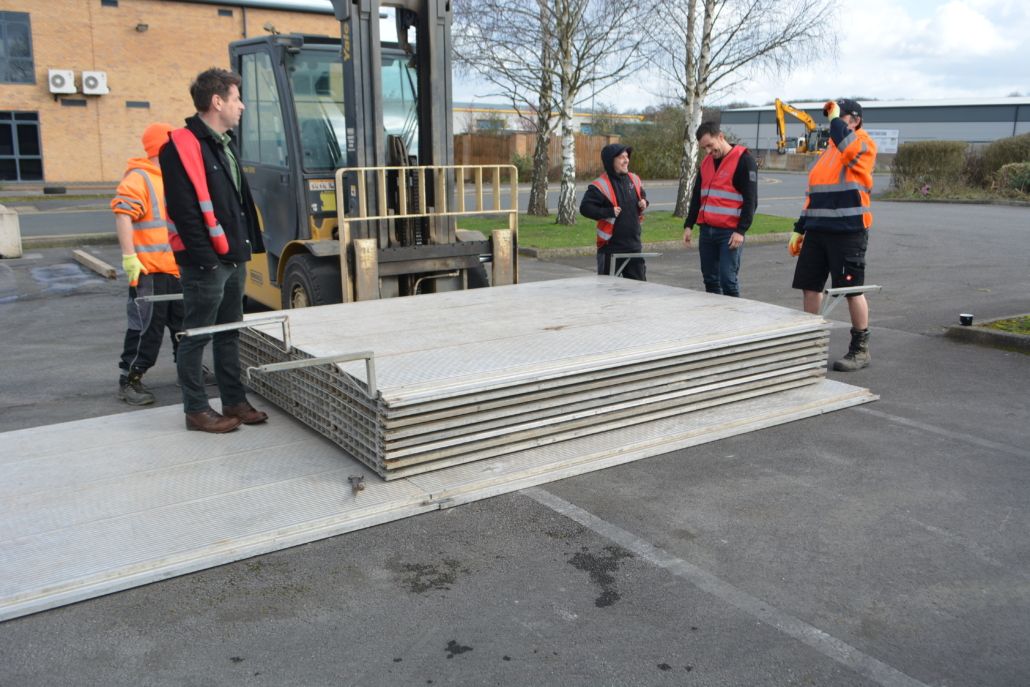
  • Arena panels are lightweight aluminium ground cover that can be laid by hand.
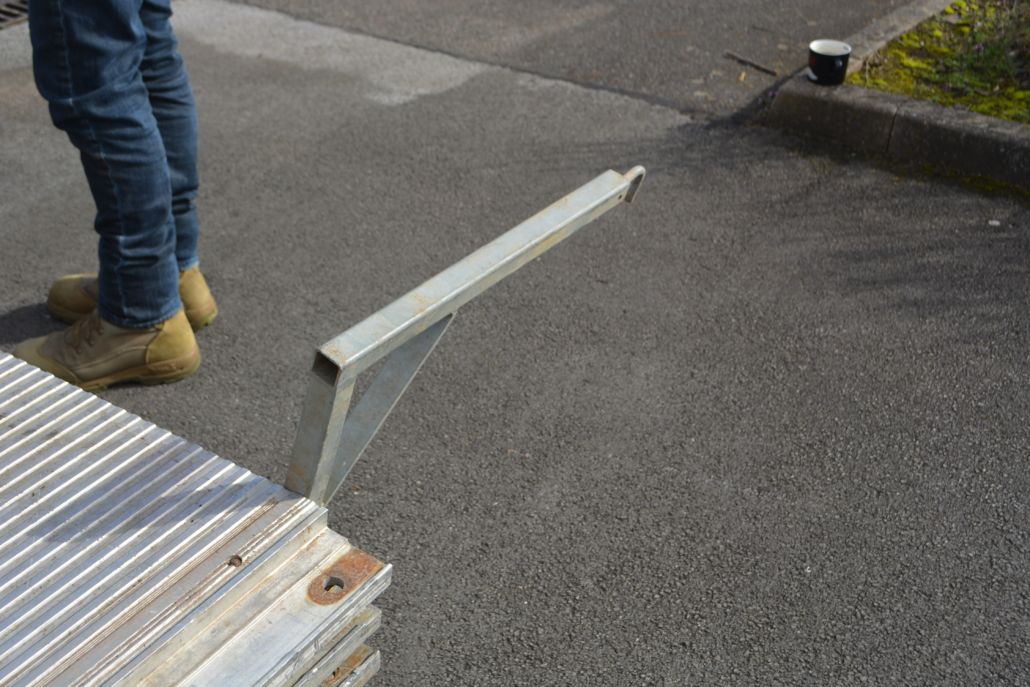
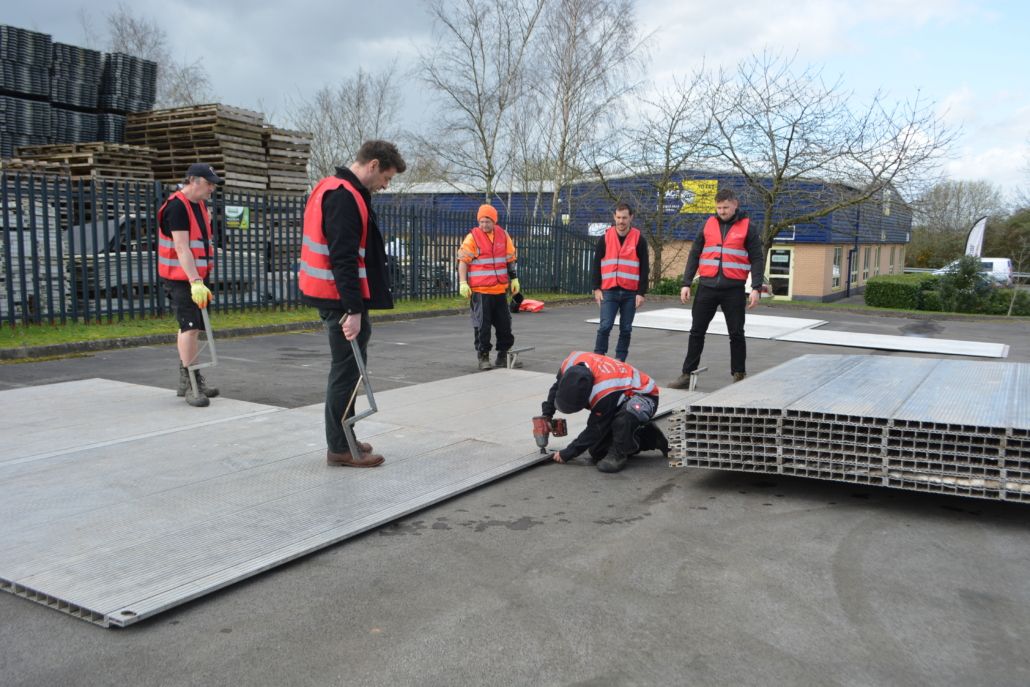
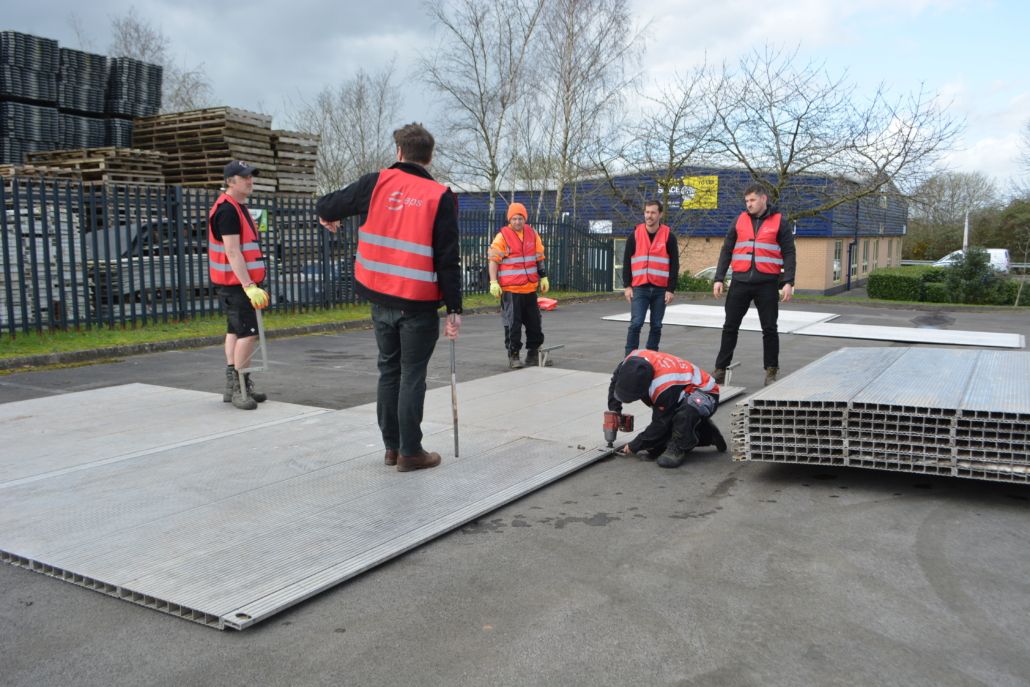
  • For manual installation, a crew of 6 is required, each crew member should have an arena panel tool; 1 person should be designated to control each lift.
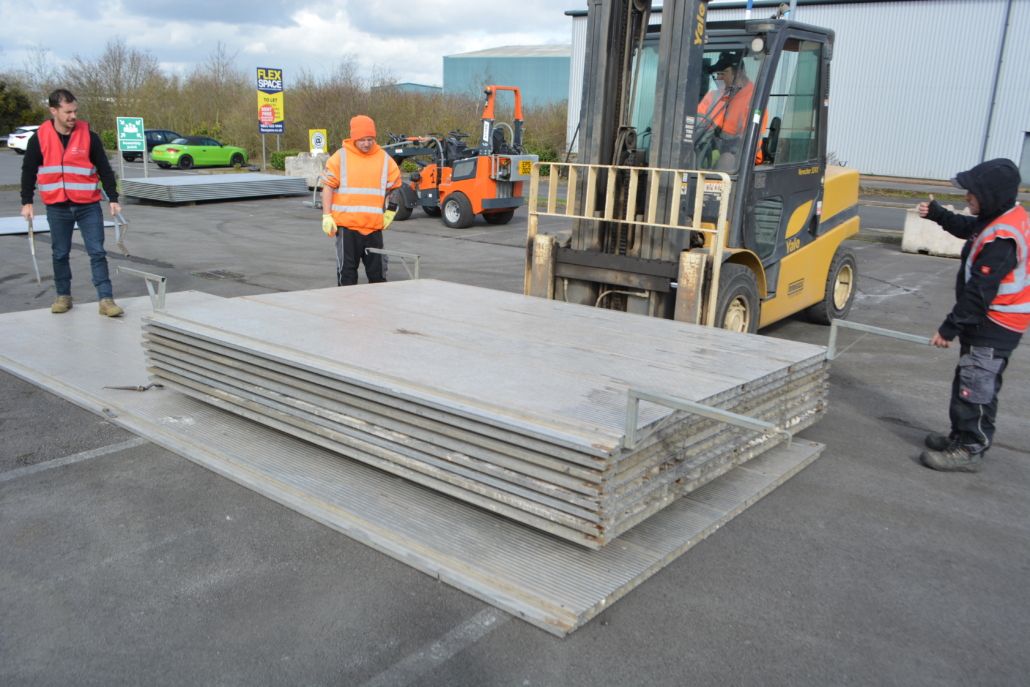
  • The stack of panels should be moved by forklift as close to the point of use as possible, the forklift operator should signal to the panel crew that they are clear to lift a panel.
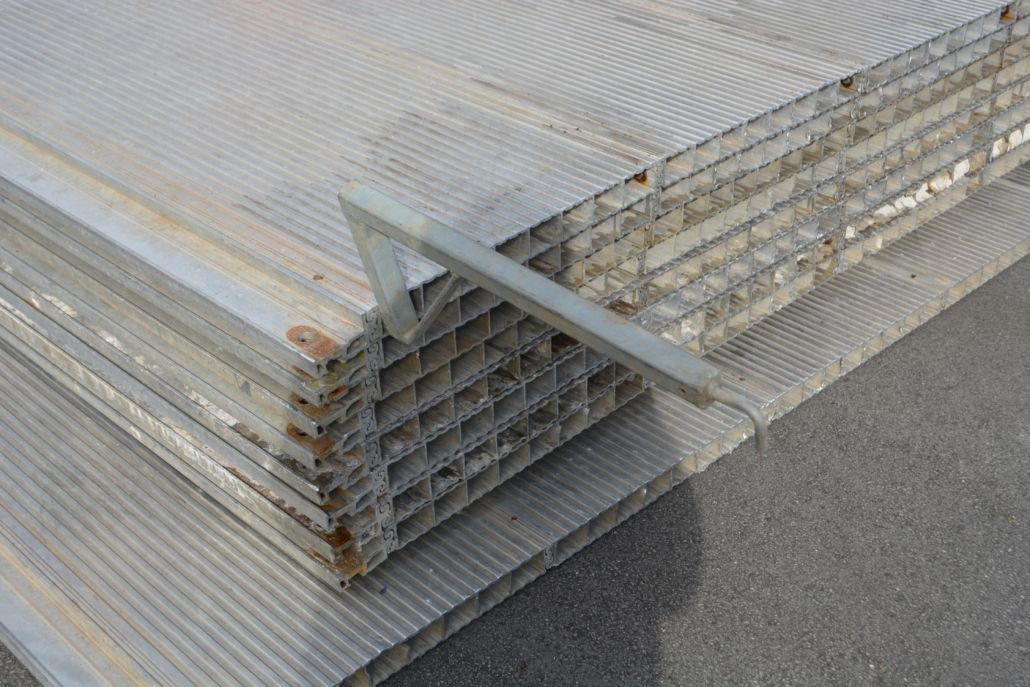
  • The 6 crew should position the lifting handles on the four corners of the panel with an additional handle positioned equally between the corners. Crew should face the direction in which they are carrying the panel.
  • On instruction from the relevant person, the panel should be lifted from the stack on the forks and walked into the correct position, then lowered to the ground.
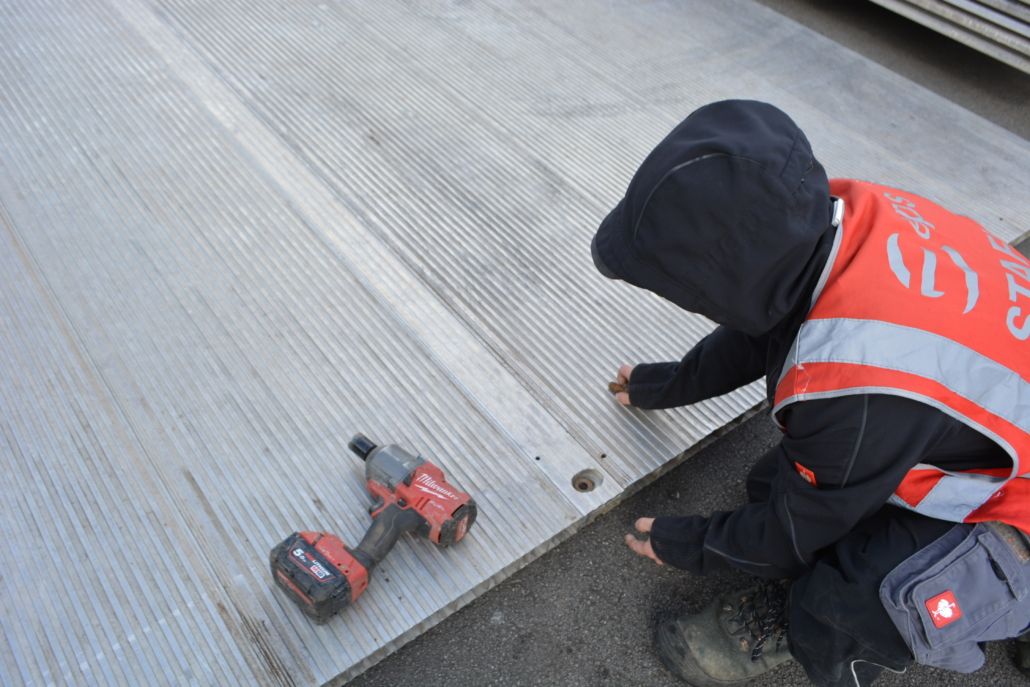
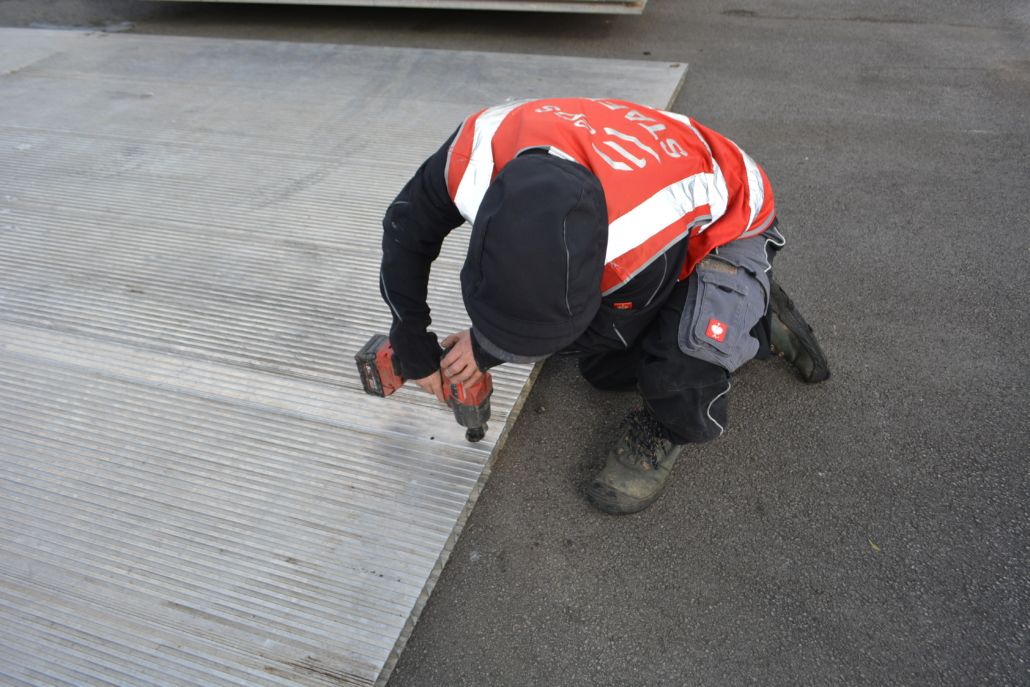
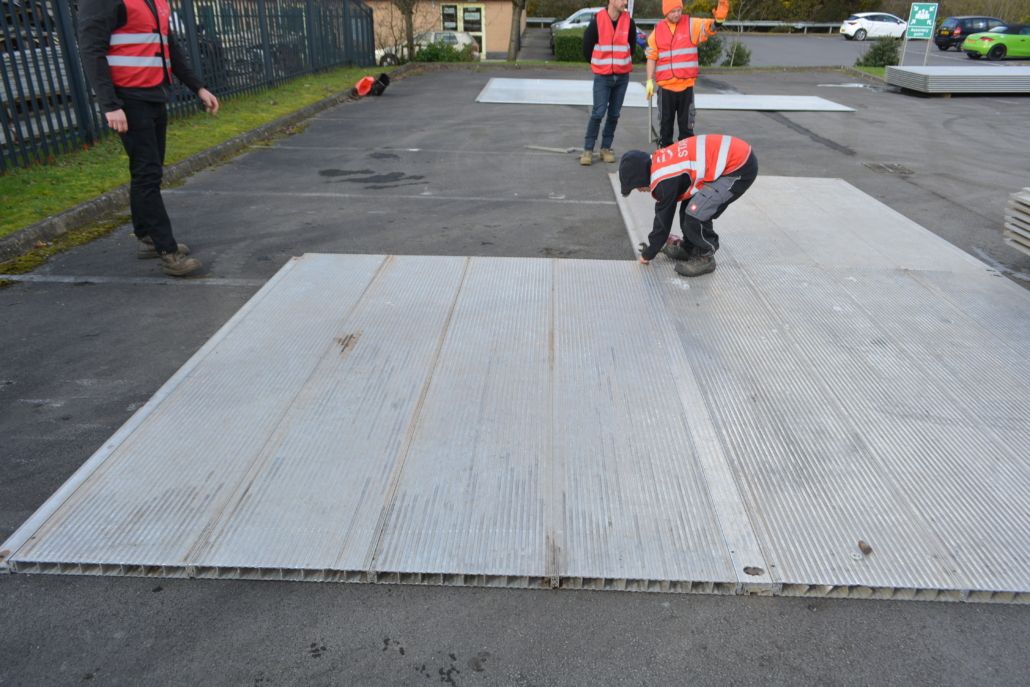
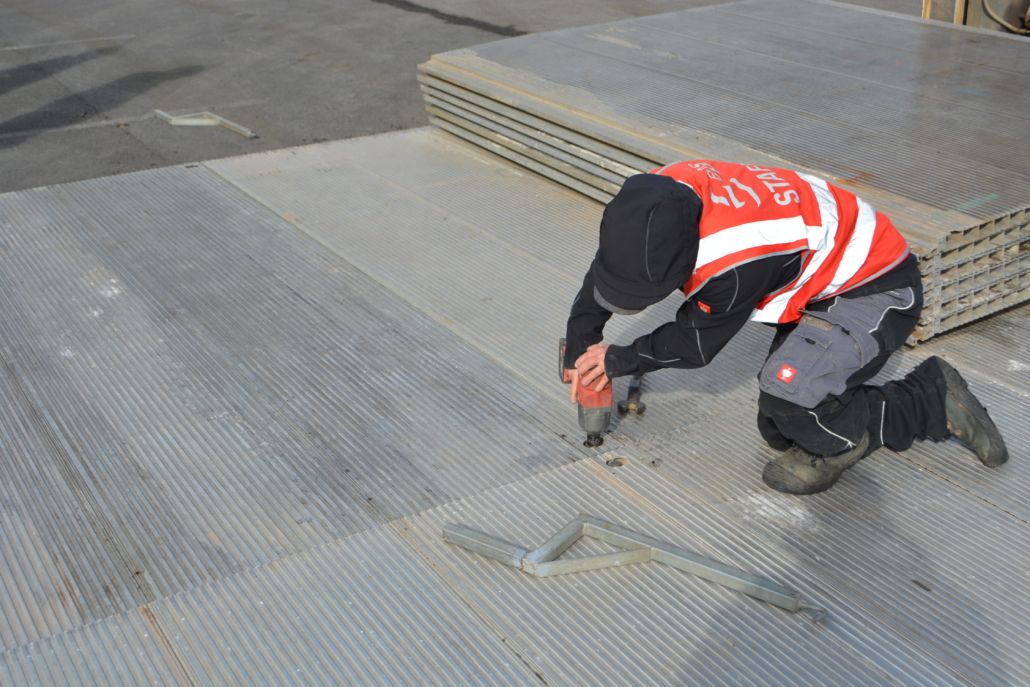
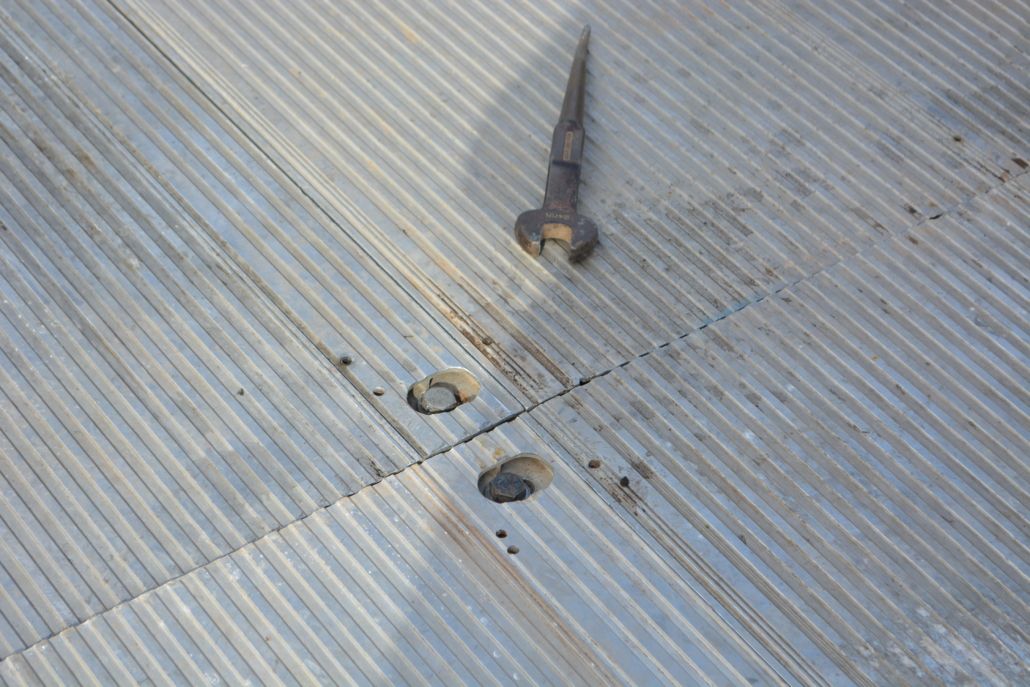
  • The next panel in the sequence should be picked up and manoeuvred as above and the bolt holes aligned with a podger, bolts should be installed as panels are put in place and tightened with the rattle gun.
  • The forklift operator should manoeuvre the stack of panels so that crew do not have to carry them further than necessary.

Arena Panel Installation Video and Images

  • This video and the images show the sequence for manually installing the arena panels.

Recovery

Recovery

  • Removal is the reverse of the installation process, crew should ensure that the bolts have
    been removed and that the panels are clear of debris and rubbish.
  • The forklift operator should position the forks as close as possible to the panel being lifted
    and confirm to the crew that it is safe to start stacking panels on the forks.
  • Crew should ensure they are facing the forks when lifting panels and ensure that the forklift
    operator has lifted the stacking pallet to a suitable height to avoid unnecessary bending.
  • If a geotextile membrane is used, it will need to be recovered once the trackway is
    lifted and, where possible, returned to EPS UK for recycling.
  • Should sandbags or packing have been used for ground levelling, then this is to be
    collected and placed in stillages for transport. Ensure the site is left as found.
    All litter and debris to be removed

Induction Confirmation

This form collects your details so that we can record who has completed this online induction.
Please check our Privacy Policy to see how we protect and manage your submitted data.

EPS Crew Safety Induction 2026

Thank you for taking the time to complete this induction. If you have any questions or queries please contact your line manager.

"*" indica i campi obbligatori

Name*
EPS or the crewing company you work for.
Are you a First Aider?*
List sites or main site you will be working at.
Confirmation*
Clear Signature